TREC – Broker-Lawyer Committee Appointments

The Texas Real Estate Commission has appointed two new members to the Broker-Lawyer committee and the state bar of Texas also appointed a new lawyer member.

The Texas Real Estate Commission voted at its August 1 meeting to appoint Charlie Still of Arlington and Gregg Glenn of Amarillo as broker members of the Texas Real Estate Broker-Lawyer Committee, with terms expiring August 31, 2017. The broker-lawyer committee is responsible for drafting and revising standard real estate contract forms, with the intent of bringing consistency to real estate transactions and minimizing potential controversy in accordance with the Texas Real Estate License Act.

Charlie Still has been an active broker since 1982 and has over 29 years of experience working with TREC’s promulgated forms.  He has been the principal broker of Still Brothers & Associates since 1987.

Gregg Glenn has been the broker / owner of Prudential Ada, REALTORS since 1983.

In addition to the broker appointments made by the Texas Real Estate Commission Bo Blackburn was appointed as a lawyer member on the committee by the State Bar of Texas.  Bo Blackburn is a partner at Almanza, Blackburn & Dickie LLP, in Austin, focusing on residential and commercial real estate litigation among other areas of practice.

The full press release is available here.(PDF Link)

Do not forget to follow us on twitter.

Are you looking for an easier way to generate all of your Texas real estate forms? See why thousands of Texas real estate professionals, investors, developers and real estate attorneys are using our Texas contract software to generate their TREC forms.  Easily send your documents for review to be modified and shared or email the completed TREC forms to a client or other agent.  Send the documents for e-signature or download them to your computer to email them from your email client.  Spell check, modify forms, save files and easily copy information over from previous deals.  Theres a reason so many people are using BULL Forms.  Try BULL Forms for free now.

TREC Forms and File Storage = Ultimate Real Estate Tool

BULL Forms is proud to announce the launch of our fully integrated file storage solution.

What does this mean for agents using our product to generate TREC forms?

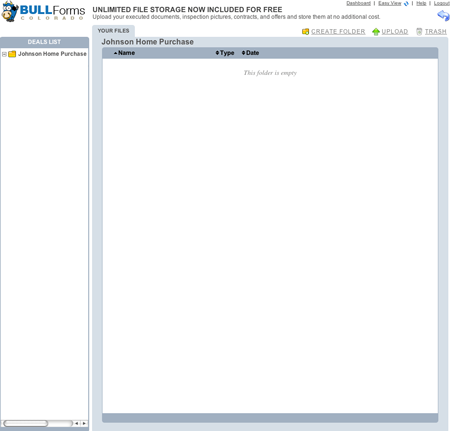
All BULL Forms Texas users can now upload, share and store all of their files easily using the same familiar interface they have become accustomed to. There is no additional charge to our users and all users have unlimited file storage!

You no longer have to use multiple programs, frequently jumping between programs. Instead you can now easily upload multiple files into your deal and you will have all of the information you need in one easy to access location. Your files are automatically synced into the cloud and available from any computer with internet access using your account credentials.

Let’s see how the file storage solution works. When you log into your account you will now notice that there is a file icon on each one of your deals:

BULL Forms Texas File Storage Icon

Click on the “files” icon to be taken into the file navigator:

BULL Forms Texas File Storage Dashboard

Once within the files dashboard you will be able to navigate between deals to view all files in each of your files.  All of your deals will automatically be listed on the left hand side of the window.  Please note: If you delete a deal, you will delete all associated forms and files!

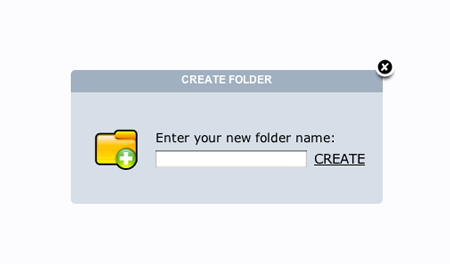
From the main screen you can choose to create a folder or upload files.  If you want to keep your files nice and neat, you may want to add a new folder, you can do so by clicking on the “Create Folder” icon, you will be prompted to name the folder, as pictured below:

BULL Forms Texas Files Create Folder

Type in your desired folder name and click create or enter to create the folder.  Here is what the folder you just created will look like:

BULL Forms Texas File Folder List

Double click on the new folder to jump in and view its contents.

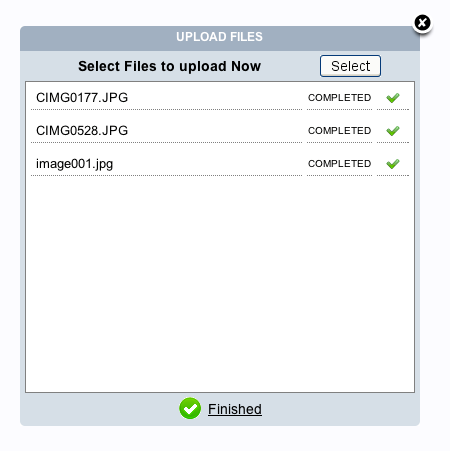
To upload files lets click on the “Upload” icon.  Click on the “Select” button near the top right corner.  Your browser’s file manager will open.  Select all of the files that you wish to upload.  You can select as many files as you like. Once you have started uploading files you will be shown your progress.  Once all uploads are complete you will see a window like this:

BULL Forms Texas File Upload

If you are done uploading files you can click on the “finished” icon or the “X” on the top right corner of the window. You will now see your files, as illustrated below:

BULL Forms Texas Files Loaded

You have the option to rename, download, share or delete each file.  If you want to send your client or co-worker a file, but don’t want to download and email the file, you can share the file with one click.  Click on the “Share” icon. The file will be shared, and you will see the following:

BULL Forms Texas File Shared


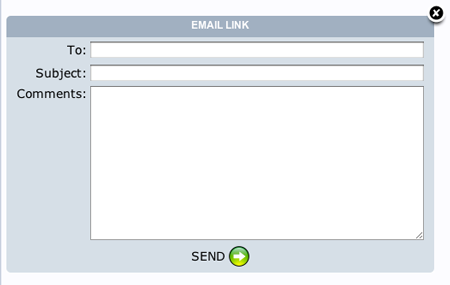
Click on the email link and you will see the email window:

BULL Forms Texas Files Email Link

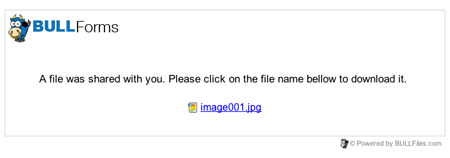
Your client or coworker will receive an email with a link to the file that you have shared. Be careful as this file will be available to any party with the link.  The public view of the file will look like this:

BULL Forms Texas File Shared Public View

All of us here at BULL Forms hope that you enjoy the file storage solution and integrate it into your Real Estate Offices. You now have one location to generate your TREC Texas Contracts and save all of your files!

As always, if you have any feedback or feature recommendations, please do not hesitate to contact us.  You will be surprised how quickly we respond.

Thank you,

BULL Forms Team

BULL Forms Texas is in the Chrome Web Store

BULL Forms Texas web app is live in the Google Chrome Web Store.

Good news for all of our users generating Texas Real Estate forms using Chrome as their web browser of choice.  Our web application is now live in the Google Chrome Web Store.  What does this mean for you? First of all, you can easily install the application by heading to the Chrome Web Store and searching for BULL Forms. Once installed, you will be able to easily navigate to BULL Forms Texas and start generating TREC Forms within seconds. We have outlined the steps to installing the application below:

First head to the Chrome Store chrome.google.com/webstore

BULL Forms Texas Google Chrome Web Store

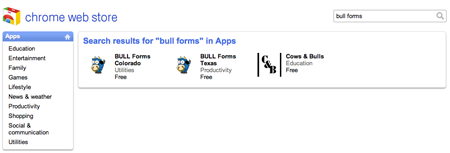
Now search for BULL Forms Texas:

Search for BULL Forms

When you reach the results page, go ahead and click on our BULL Forms Mascot, “Bob the Bull”

BULL Forms Texas Click on Bob the Bull

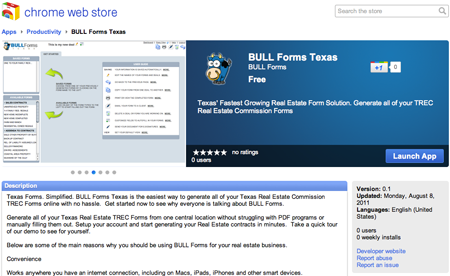
You will then be taken to the details page:

BULL Forms Texas Chrome Web Store TREC Forms

Click on install and the magic will happen behind the scenes.  Now the BULL Forms Texas Web application has been installed into your Chrome Web Browser.  You can access it whenever you start up your computer or open a new tab, as pictured below:

Installation CompleteAnd that is a wrap folks.  Click on “Bob the Bull” and you will be taken to your favorite site for Generating Texas Real Estate Forms.  As always, stay on the lookout for improvements and we will notify you as soon as we have added more functionality to the application.

Thank you,

BULL Forms Team

How to E-sign TREC Forms

All subscribers to BULL Forms Texas have unlimited e-sign capabilities built into their accounts. Just as fax machines made our lives as real estate professionals easier in the 1990’s, e-signature capabilities are increasing our efficiency today. You no longer have to print out documents and fax or scan them to your clients. Then sit and wait for them to return the documents hoping and praying that they are sent back correctly the first time. Then the revisions begin!

Why not increase your efficiency and save some time during the signature process? Send out your contracts for e-signature and you don’t have to worry about your clients signing or initialing in the wrong places.  All of the TREC (Texas Real Estate Commission) forms can easily be sent out for e-signatures.  Adding to the time savings is the fact that all of the signature spots and initial locations have already been placed for you. All of this is great! But how do you use e-signatures on your TREC contracts?  Read on:

E-signature Process for TREC Forms

After you have completed all of the TREC contracts that you would like to send out for e-signatures, click on the email icon, which is an envelope with a pen, highlighted in the yellow circle below:

BULL Forms Texas TREC Forms Signature Icon

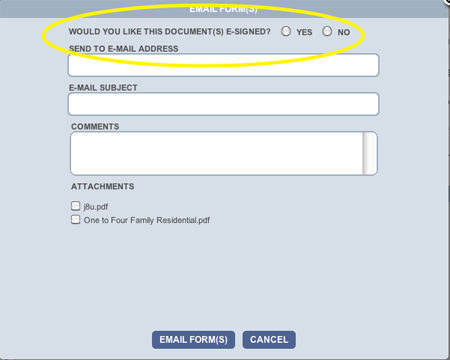
Once you have clicked on the email icon, the email window will appear on the screen. You want to send out documents for e-signature, click on the yes radio button:
BULL Forms Texas TREC Forms Email Window

After choosing to send out your documents for e-signatures, you will be presented with options for e-signing your TREC forms. All of the signature spots have been placed for you, all you have to do is select who you want to sign the documents and where you want the parties to sign.  We have assigned “roles” to all of the available signature locations.

Roles for E-Signatures

  • Buyer 1
  • Buyer 2
  • Seller 1
  • Seller 2
  • Tenant 1
  • Tenant 2
  • Landlord 1
  • Landlord 2
  • Buyers or Tenants Agent
  • Listing Agent
  • Escrow Agent
At this time, these are the only roles / signature spots available. Do not worry if you are looking for more functionality from our e-signature feature, its coming soon…

Sending your TREC Forms out for E-signature

Enter the first name, last name and email address for the party you want to sign the documents and then select their role.

BULL Forms Texas TREC Forms Signature 1

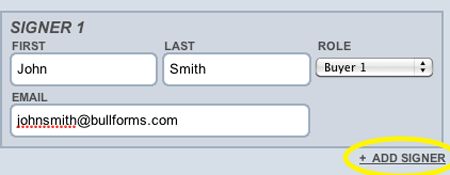
To add another party to the transaction, click on the add signer link:
BULL Forms Texas TREC Forms Add Signer

If you have added all of the parties that you want to sign the document you are ready to send it out for signatures. Make sure you have added all of the roles, if they are not included now you will have to start a new e-signature transaction.

Before sending out the documents make sure you select all of the forms within the deal that you want to send out for signatures. You should also enter a descriptive subject line and comments to all of the parties receiving the email.
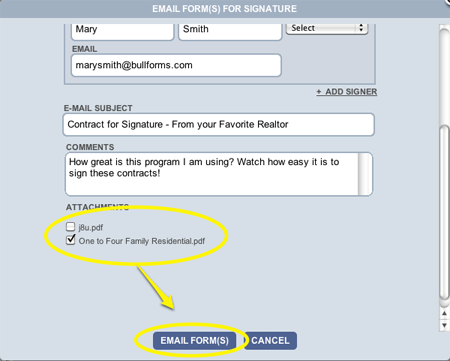
BULL Forms Texas TREC Forms Esignature Send

Congratulations, you have just sent your TREC Forms out for e-signatures.

E-signing the TREC Forms

All of the parties you included in the transaction will receive an email when it is their turn to sign the documents. All parties will have to consent to transacting electronically with you and your company, if you have added your company in your membership profile. This consent ensures that you are complying with all of the e-sign laws.

When a signer clicks on the link in their email, they will be taken to the main e-signature page:
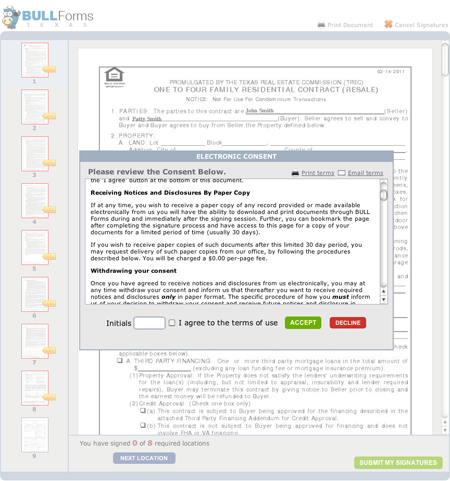
BULL Forms Texas TREC Forms Esignature Compliance

Once the party e-signing agrees to conduct business electronically they will receive an email with their confirmation. They will then be taken to an area that allows them to customize their signatures and initials.
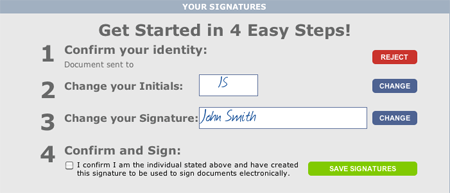
BULL Forms Texas TREC Forms Esignature Steps

The program can either generate initials and signatures for the user, or they can create their own using the mouse to write their initials or signatures.  The option to change your initials is below:
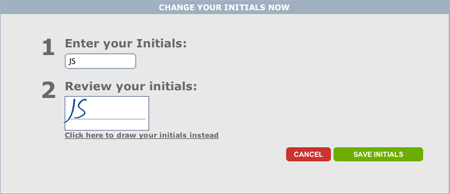
BULL Forms Texas TREC Forms Change Initials

Here is the window to change the signature:

BULL Forms Texas TREC Forms Change Signature

Once the user has created their signature preferences they will be taken to the signature window:
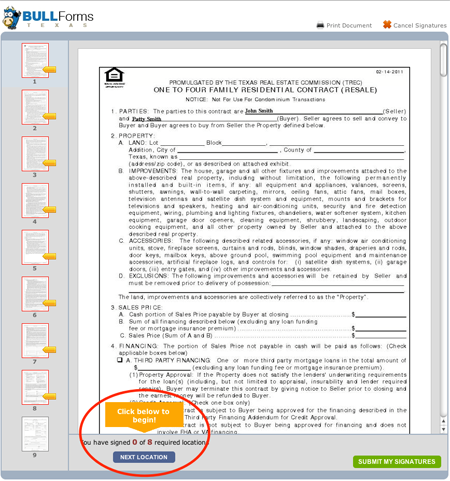
BULL Forms Texas TREC Forms Starting E-signatures

On the left hand side of the page the signor will see all of the pages that require attention.  On the document above pages 1 through 8 require attention and are showing with a red background and orange tab.  As initials and signatures are completed on each page, that page will turn green. By clicking on the next location button the user will be taken to the next initial or signature location requiring their attention.

An initial location will look like this:
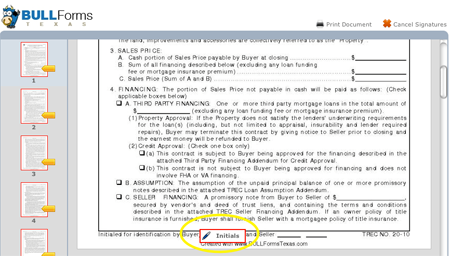
BULL Forms Texas TREC Forms Initial Document

A signature location will appear as follows:

BULL Forms Texas TREC Forms Signature Locations

Once all initials and signatures have been completed a green button near the bottom of the screen will blink and the user will be prompted to complete the transaction.
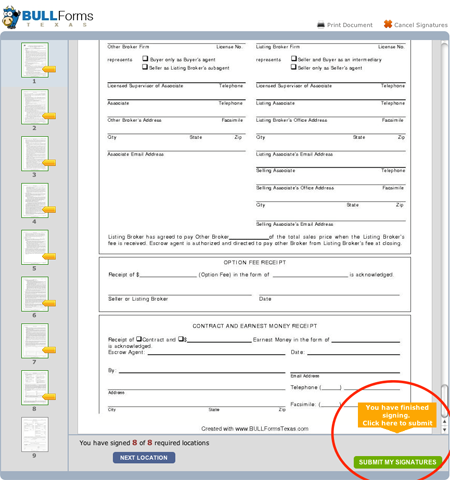
BULL Forms Texas TREC Forms E-signatures Complete

After the user has completed their portion of the signature transaction they will receive an email notifying them they have completed signing the document.  They will also receive a link allowing them to download the document they just signed.  The next party in the transaction will now be notified via email and will start the e-signature process over again.

Checking on the Status of TREC E-signatures

You have sent out your TREC contracts for e-signatures, but you have not received the completed document back yet. What do you do? You can access your e-signature transactions from your e-signature dashboard.  From within the BULL Forms click on the “dashboard” link near the top right of the screen:

BULL Forms Texas TREC Forms Dashboard

From within the dashboard, click on the e-signature tab:
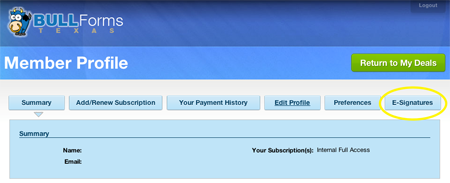
BULL Forms Texas TREC Forms E-signature Panel

When in the e-signature panel you can view all of your pending, completed and cancelled transactions. If for any reason one of the members in a transaction has not received an email you can resend the email.  If you need to cancel a transaction at anytime you can also do it from here.
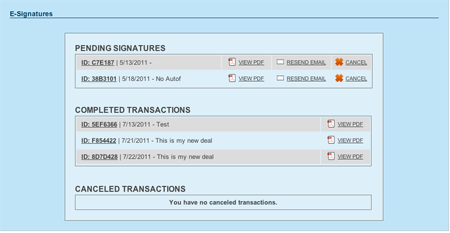
BULL Forms Texas TREC Forms E-signatures Panel

This wraps up our tutorial on how to use our e-signature feature.  If you have any questions please feel free to use our contact form.

Thank you,

BULL Forms Team
Feature Update – Classic View and Strike Out

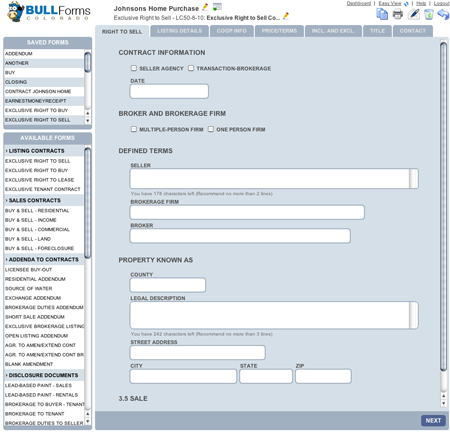
We are excited to announce that we have just launched a new way to use BULL Forms.  Most of you are used to seeing a screen such as the one below when completing a contract.

BULL Forms Quick View

We are now calling this view “quick-view.”  Our intentions with this view were to make completing contracts as easy as possible by removing all of the additional text that experienced Texas Real Estate agents do not need to read when completing their contracts.  While reception to “quick-view” has been mostly positive, we have received several requests to be able to view the contract while inputting information.  Another requested feature was strikethrough.  Given that you cannot view the entire text of the real estate contract was not visible in “quick-view” it was impossible to implement strikethrough.

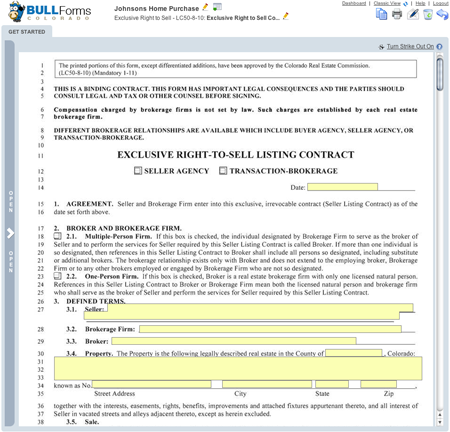
Therefore, we decided to launch “classic-view.”  Now, when you toggle your view to “classic-view” you will see something like the image below:

BULL Forms Classic View

Using “classic-view” you can now see all of the Texas Real Estate Commission (TREC) contracts while you are completing them. You can also easily switch between the views by clicking on the view toggle near the top of the page.

BULL Forms Select View

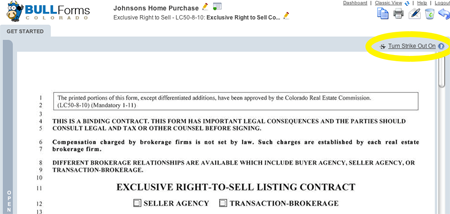
While you are in classic view you can also use the strike through feature.  Start by clicking on the “Turn Strike Out On” link, as pictured here:

BULL Forms Strike Out

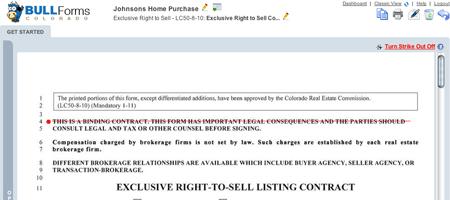
Once you have clicked on the link, your cursor will take a new shape, start by clicking where you would like to begin striking out, drag your mouse along as far as you would like to strike out.  Don’t worry, the tool only allows you to create straight lines! When you have reached the end of the sentence or the end of the area you would like to strike out, click again, you should see something like below:

BULL Forms Strike Out in Progress

Once completed fret not, it is possible to remove the strike out from the document.  You can do so by clicking on the red “X” at the end of the line, as highlighted below:

BULL Forms Remove Strike Out

This about wraps up our coverage of our new “Classic-view” and strike out features.  Now get out there and generate some Texas Real Estate Contracts and make some deals!

As always, if you have any questions or concerns, please drop us a line.

Thank you,

BULL Forms Team